Initial Configuration
This document walk-though the initial setup, customization and configuration of the new Indoor Finders instance.
Portal Login
- Login into the Indoor Finders Portal with the provided local admin account.
- Click on Admin Login link to switch to the admin portal.

** Admin can login to the Admin Portal directly by using the local account via https://instanceURL/admin
Authentication
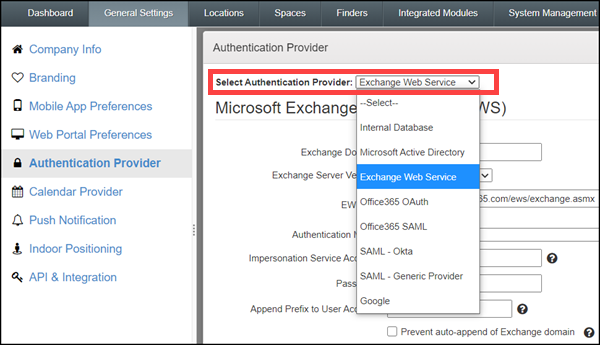
- In General Settings -> Authentication Provider, Admin can setup the user authentication provider for user login.
- Once SSO is in place, go to Admin Portal -> System management -> Role Assignments, click on System Admin, then click the Add button to add the admin email address.
- Logout of the system and login with SSO. In the main screen, admin can click -> Admin Portal link to switch to the admin portal.
- In the Admin Portal, review the admin list and delete any local admin accounts if not longer needed.
Branding and Customization
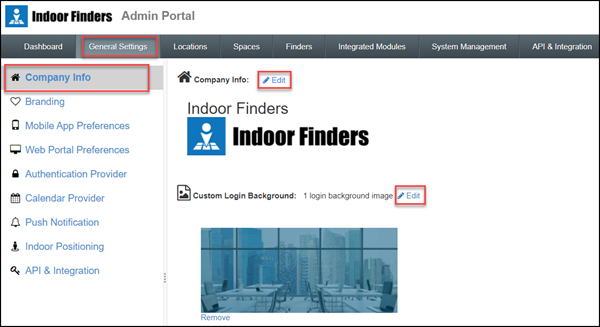
- In the Admin Portal, click General Settings. Click Edit to update the company name, logo and web login backgrounds.
- In Admin Portal -> General Settings, there are few sections, including Branding, Mobile App Preferences and Web Portal Preferences to customize the look and feel of the Desktop web portal and Mobile app (Additional customization available in the Finders properties to customize the Finder module titles).

Location and Floorplan
- Location Tree
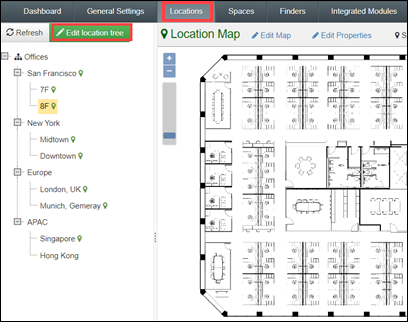
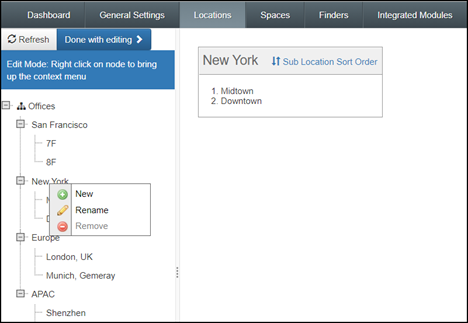
- Go to Admin -> Locations. The screen shows the location tree (and highlighted which floor has Floorplan). Click Edit location tree to make changes or add new locations. Admin can also modify the display order for the locations.
- Floorplan Import
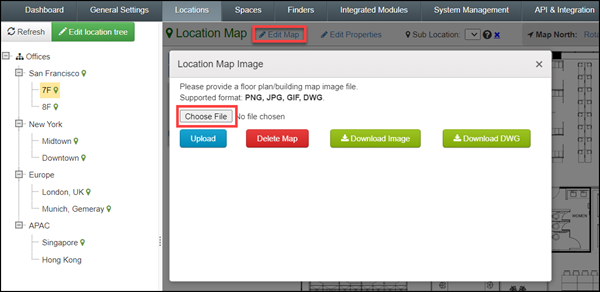
- Select a floor location then click Edit Map to upload/update the Floorplan. Floorplan can be JPG, PNG, or AutoCAD DWG files.
- Location Property
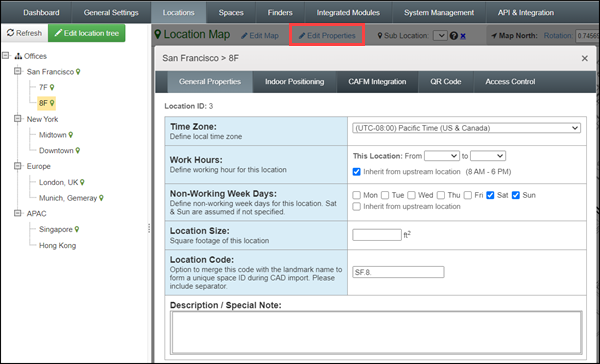
- Click Edit Property to update location specific information such as time zones and work hours and days.
(Other advance options includes enable compass mod so that the floorplan map will rotation based on the mobile device orientation, integration with real-time Indoor positioning system for real-time positioning and navigation, or setup the floor as secure floor where only users that have the permission can view this floorplan.)
Spaces and Categorization
- Add new spaces
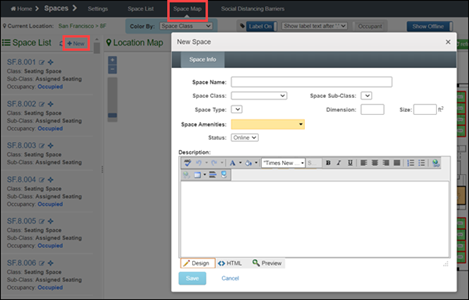
- Once location been setup, the next steps is to create spaces (If imported from DWG file, the spaces may already imported automatically). To create space manually, go to Admin Portal -> Spaces -> Space Map, click +New, follow the screen instruction to add the space name and add space pin/polyline.
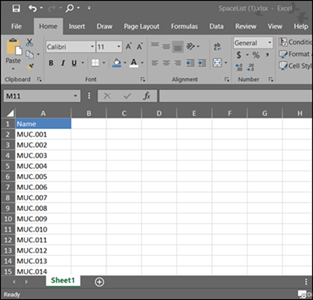
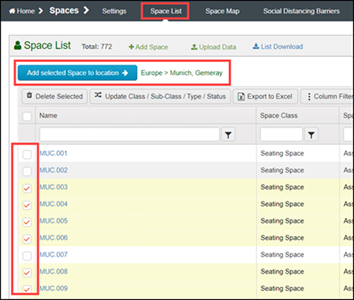
- Admin have the option to mass import spaces from CSV/Excel files. To import spaces, create a Excel/CSV file with a column Name, and then add the needed spaces. Go to Admin Portal -> Spaces -> Space List and click Upload Data. Admin then select the list of spaces and assign them into a location floorplan.
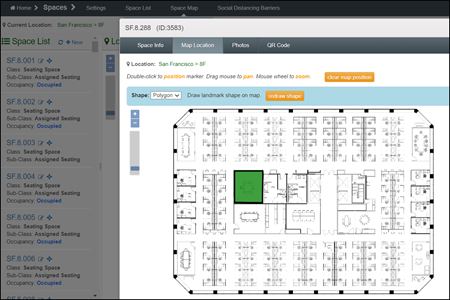
- Space Location
- Go to Admin Portal -> Spaces -> Space Map, slide to enable Pin Drop Off/On (to enable it), then select the space on the left menu and then double click on the map to drop its location pin (or click the Edit icon, click the Map Location tab, then drop the shape point or draw the polygon shape for the space).
* When imported from DWG file, the space name and location poly-line shape can be created automatically.

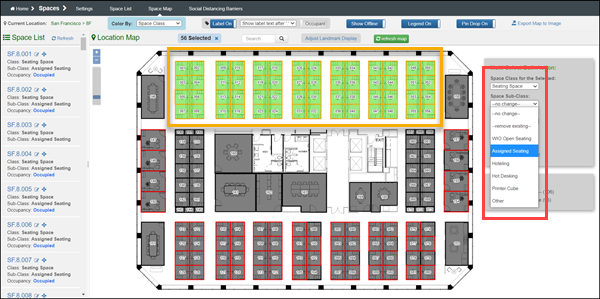
- Space category
- Select the spaces (Alt Key + Mouse Drag), then select the space class, sub-class to categorize the spaces.
Finder Setup
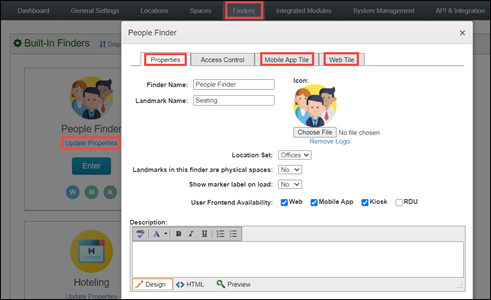
- Spaces assigned to the associated Finder modules. In Admin Portal, click Finders, then continue the setup in the respected Finder modules.
- Work-In-Office - Workspace Reservation for both Assigned Seating and Reservable Seating with Capacity Control, Social Distancing, Wellness Form, and Contact Tracing features.
- People Finder - Enable users to look for colleague's contact information, free/busy schedule, move planing, and OrgChart (when enabled).
- Room Finders - Conference Room Reservation on User Web Portal and Mobile App, Room Panel Display App and Roomboard Display App.
- Seating Space Manager - Manage User seating assignment, scenario planning, report various visual and tabular reports.
- General Amenity - Enable user to view amenities in the floorplan.
- Custom Finders - Create custom finder that user can lookup and locate.