CAD DWG Prep for Floorplan Import
This document describes how to prepare DWG for Indoor Finders floorplan map import
DWG Layers
When importing a floor plan from a DWG file, the Indoor Finders system can automatically detect and import spaces. To enable this functionality, the DWG file must include the following layers:
- IFS-SPACE-BOUNDARY — Contains a closed polyline defining each space.
- IFS-SPACE-LABEL — Contains the text label for each space. Each label must be placed within its corresponding space boundary.
In addition, the system can automatically recognize certain standardized naming conventions. For the boundary layer, it accepts IFS-SPACE or A-AREA. For the label layer, it accepts IFS-SPACE-TEXT and A-AREA-IDENT. Administrators can also define custom layer names when importing a DWG file.
Layer Names and Functions:
IFS-SPACE-BOUNDARY - Space boundary polyline layer used for shape extractionIFS-SPACE-LABEL - primary space label/text layer used for label extractionIFS-COLOR (prefix, e.g. IFS-COLOR-*) - designates color-control layers; when present, non-color-layer entities are forced ByLayer for consistent output coloring IFS-EXTEND - disabled/treated specially (transparency handling) during raster generation
Prepare DWG for Floorplan Import
- Make a Save As... copy of the DWG file so that the original is kept as-is and not altered by any of these steps.
- Bind all external reference drawings (Xrefs). The Indoor Finders application can only import what is contained in a single DWG file.
- If the import run into issue of missing parts in the DWG file, do the following:
- Switch to Model Space if currently in a layout or paper space view. Indoor Finders will only import objects and layers as seen in model space. Make sure the model space layout is the desired file you are attempting to import.
- Unlock all layers, any layers currently frozen set to off instead.
- Run the AUDIT command to detect and fix any errors in the file.
- Run the PURGE command and perform a Purge All of the file.
- Set all layer line-weights to the "Default" value.
- Run the command SETBYLAYER for ALL objects answering Yes to change ByBlock to ByLayer and Yes to Include Blocks.
- EXPLODE any Architectural Block elements (AEC Objects) such as walls, doors, and windows.
Floorplan Import
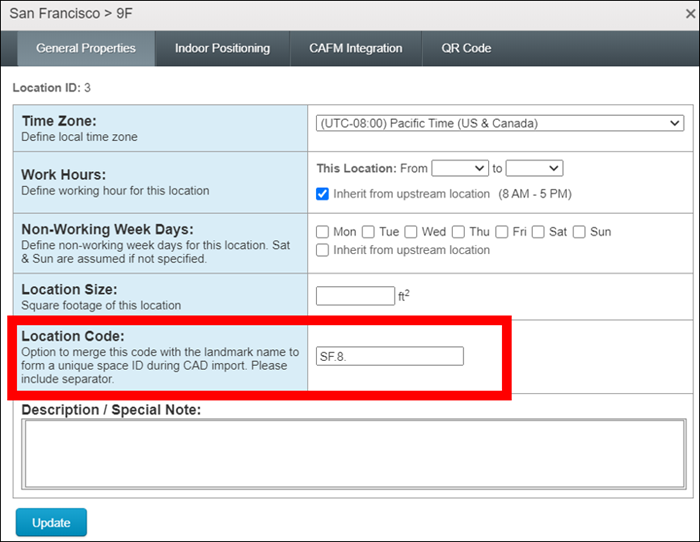
- Add space name prefix (if needed - Space name needs to be unique. If the space name in the DWG file only contain the space number, it might have conflict with other space names. To make the space unique, admin can add a space prefix when importing the DWG files). In Admin Portal -> Location, select a floor and click "Edit Properties", add the Location Code prefix.
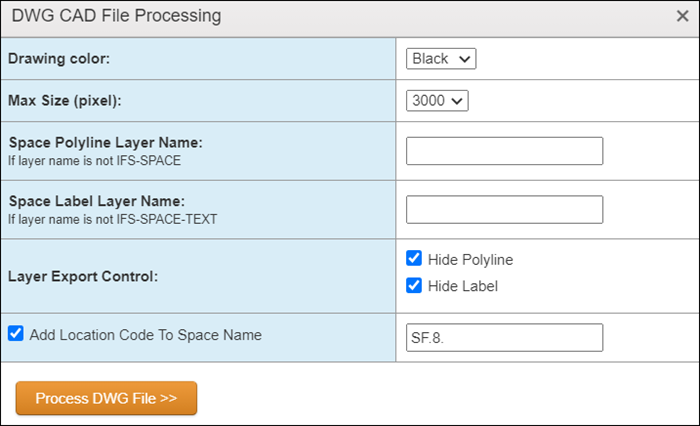
- Back to the floor screen and click "Edit Map", choose the DWG files and click "Upload", then select the option and click "Process DWG Files" to import the DWG files into the system.
- If the DWG file don't contain the space polyline and name layer, the system will import the floorplan map into the system. Admin will need to create the space and drop space location pin manually.
- If the DWG file contain the space polyline and name layer with different layer name, admin can specify them during the import.