Office365 OAuth with Microsoft Graph API
This document provides the procedures required to configure Office365 Modern Authentication (OAuth 2) support for Microsoft Graph API
Register the Application with Azure
- Sign into the Azure portal (https://portal.azure.com) with a user ID that has Global Administrator rights.
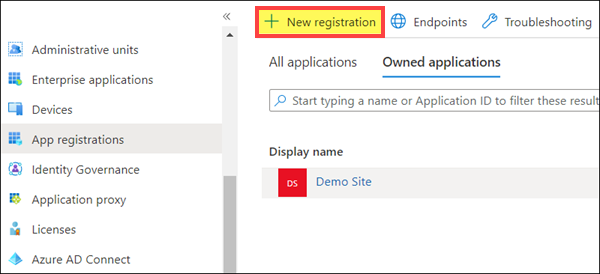
- Select App registrations from the Azure widget menu.
- Click + New registration.
- Name: Indoor Finders (of any App name you prefer)
- Support account types: Accounts in this organisational directory only (Single tenant)
- Click Register button to continue.
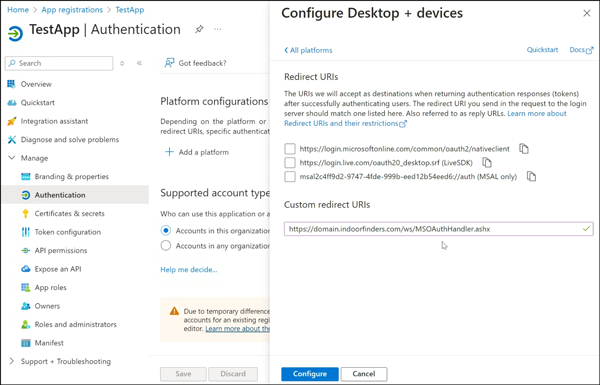
- Select Authentication from the widget menu
- Under Platform configurations, click +Add a platform, then select Mobile and desktop application.
- In Redirect URIs page, under custome redirect URIs, enter , then click the Configure button to continue.
- In the Advance settings section
- Under Allow public client flows, select to enable Yes In Enable the following mobile and desktop flows.
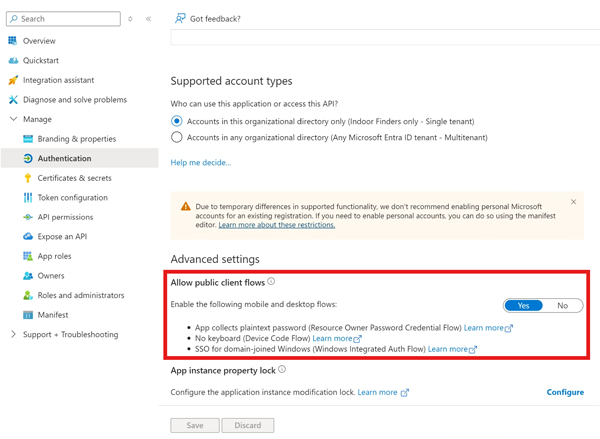
- Click Save to save the settings.
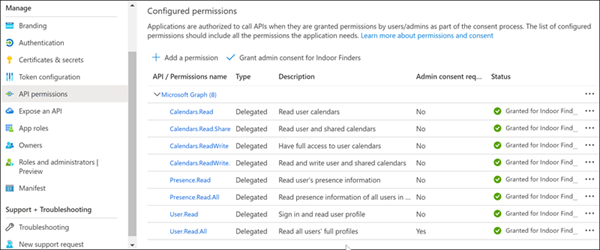
- Select API permission from the widget menu, click + Add a permission
- Click Microsoft Graph section, then click Delegated permissions.
- Scroll down and expend Calendars, check all the boxes:
- Calendars.Read.Shared
- Calendars.ReadWrite
- Calendars.ReadWrite.Shared
- Scroll down and expand User, the check the boxes below:
- Optional - Scroll down and expand Presence, then check the blow boxes (this is to show the user Team presence on Indoor Finders -> People Finder -> Seating chart)
- Presence.Read
- Presence.Read.All
-
Click Add permissions button.
- Click "Grant admin consent for your company” button, and then click Yes to confirm (This is required for Room Display Unit App).
**Special Notes for Conditional Access:**
When conditional access is enabled with a VPN requirement, the Indoor Finders hosting server must be added as a trusted location. This ensures silent OAuth token renewal from the backend. Without the trusted location, a blank screen may appear upon user login. The public IP of the Indoor Finders hosting server can be found by pinging the instance (typically `{domain}.indoorfinders.com`).
Enable Indoor Finders App in Office 365 User Portal (Optional - Enable to control which users or groups can login via SSO. By default, all users can login via SSO)
- In Microsoft Azure, click Azure Active Directory -> App Registrations, then click on the App that you just created.
- Click Branding, then update the Home page URL as https://company.indoorfinders.com. You can also update other information such as the App Name and Logo.
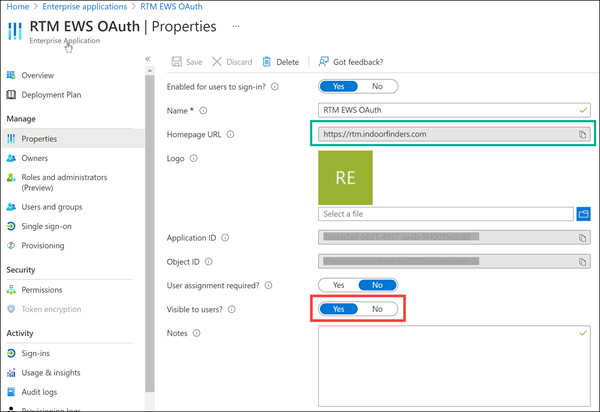
- Click Home -> Enterprise applications, click on the App name, and then click Properities. Make sure the App is Visible to users. Please also verify the Homepage URL pointed to https://company.indoorfinders.com.
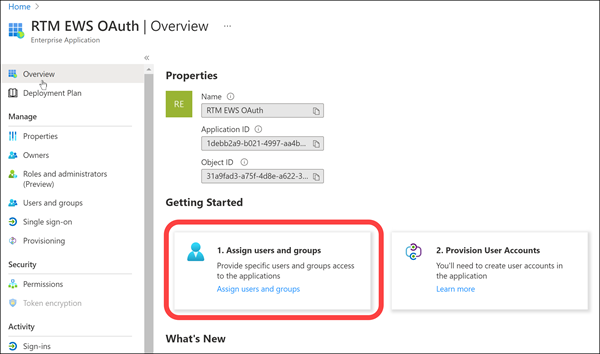
- Optional - Click Overview, click 1. Assign users and groups, and make sure you granted permission for users/groups to have access to view and launch the app.
Indoor Finders - Enable Office 365 OAuth Authentication
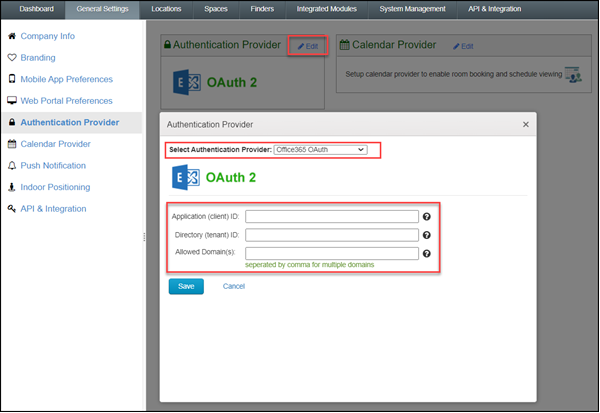
- Go to Admin Portal -> General Settings -> Authentication Provider, click Edit.
- Select Office365 OAuth as the Authentication Provider.
- Copy the IDs from the Overview section in the Azure app just created.
- Include any domain that allow to access this Indoor Finders instance.
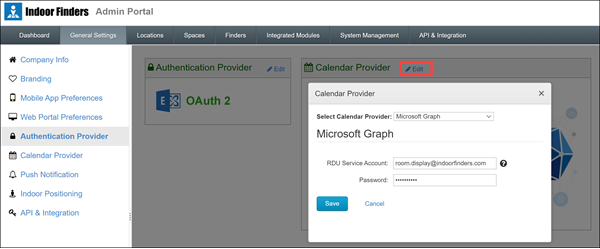
Indoor Finders - Connect Office365/Exchange Calendar
- Click Edit Calendar Provider, select Microsoft Graph as the calendar provider. If you are deploying the Room Display App, provide service account info that have Editor permission to all the conference room calendars.