Google Workspace Authentication
This document describes setting up User Authentication via Google Workspace Authentication for Conference Rooms.
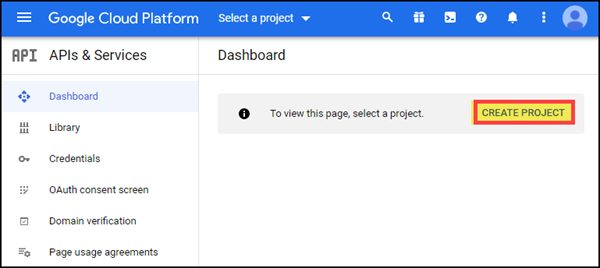
Google Developer Console - Create New Project
- Go to https://console.developers.google.com, click CREATE PROJECT, type in the name (ex: Indoor Finders), select the Organization and Location, then click the CREATE button.
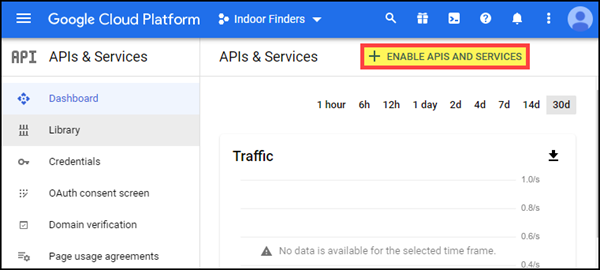
- Click + ENABLE APIS AND SERVICES.
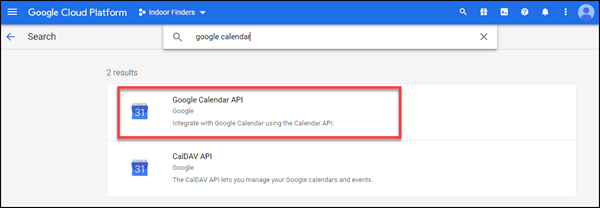
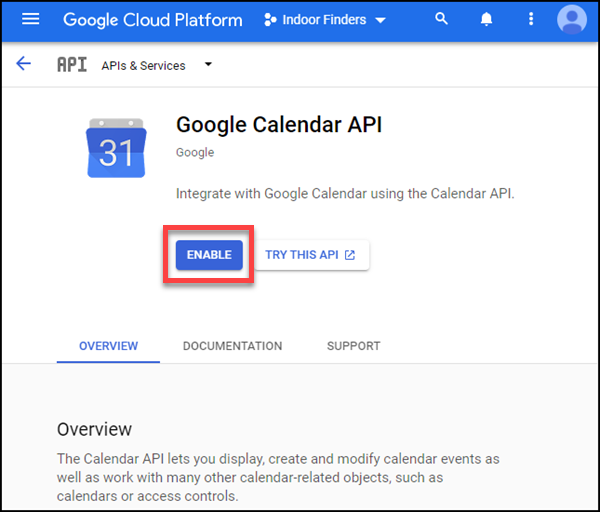
- Search and click the Google Calendar API button to start the configuration.
- Click ENABLE button.
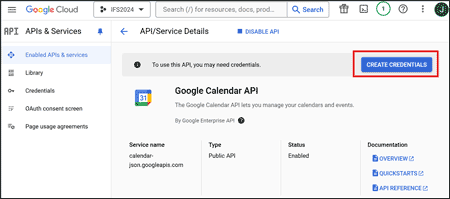
- Click CREATE CREDENTIALS.
- In the Credentials screen, select Google Calendar API and User data, then click the Next button.
- In the OAuth Consent Screen, provide the App Name, user support email, app icon, and developer email address, and then click SAVE AND CONTINUE.
- In Scopes (optional), click SAVE AND CONTINUE.
- In OAuth Client ID, select web application, provide a name, under Authorized JavaScript origins, click +Add URI and then type in your instance URL.
- https://{companyname}.indoorfinders.com
- Still In OAuth Client ID, Under Authorized redirect URIs, click +ADD URI and then append “ws/GoogleSignIn.ashx” to your instance name. Click + ADD URI button and add additional URI:
- https://{companyname}.indoorfinders.com/ws/GoogleSignIn.ashx
- https://{companyname}.indoorfinders.com/ws/GoogleSignInIFSApp.ashx
- Still in OAuth Client ID, click the CREATE button.
- Under Your Credenticals, click DOWNLOAD to download the JSON file, click DONE when finished.
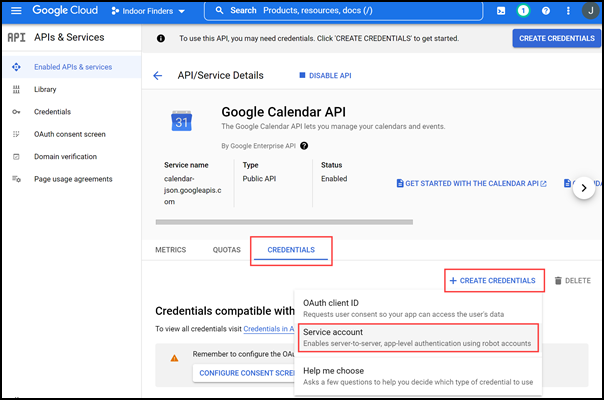
- Back in the Google Calendar API page, click the Credentials tab, click + CREATE CREDENTIALS, then select Service account.
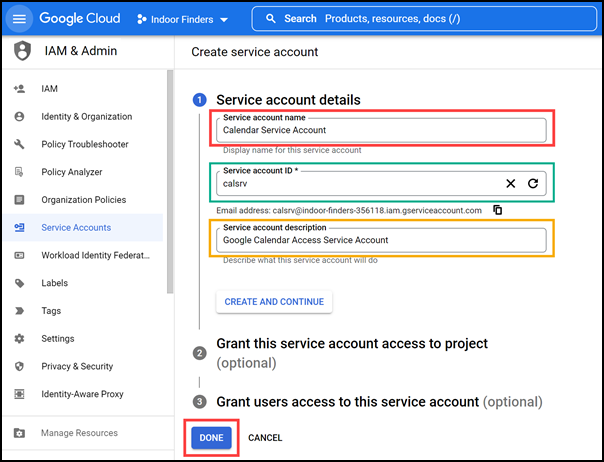
- Provide the service account details (service account name, service account email address, and service description), click the CREATE AND CONTINUE button to go to the optional settings, or click DONE to finish.
- Under Credentials compatible with the API -> Service Account, click Manage service accounts.
- Click the action menu and select Manage details. Please make a note of the Unique ID, copy the ID, you will need it in the future steps.
- Click KEYS tab, then click ADD KEY, and select Create new key.
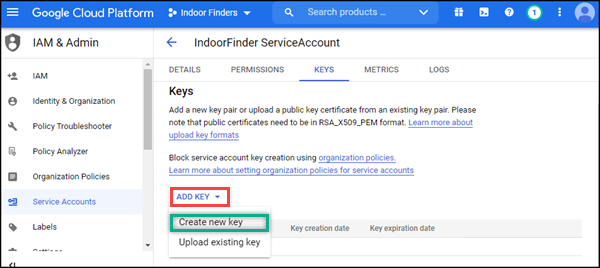
- Select P12 and then click CREATE. the browser will automatically download the P12 certificate, you will need this for the configuration later.
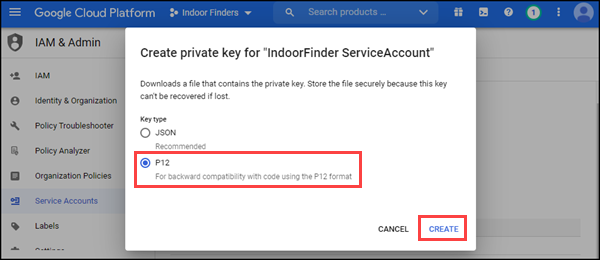
- Click CLOSE when the service account created and the P12 certificate downloaded.
- Expand Advanced settings to show SHOW DOMAIN-WIDE DELEGATION, click the button VIEW GOOGLE WORKSPACE ADMIN CONSOLE button. (Please make a note of the Unique ID, copy the ID, you will need it in the future steps.)
Google Developer Console
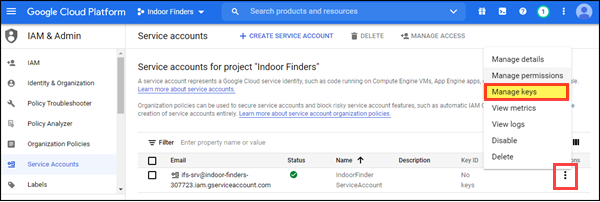
- Go back to https://console.developers.google.com browser tab, click service accounts in the sidebar.
- Click the action menu and then select Manage keys.
- in the Keys screen, click ADD KEY, and then select Create new key.
- Select P12 and then click CREATE. the browser will automatically download the P12 certificate, you will need this for the configuration later.
- Click CLOSE when the service account created and the P12 certificate downloaded.
Google App Admin Console
- Login as admin at https://admin.google.com, click the security icon.
- Go to Main menu > Security > Access and data control > API Control, click Manage Domain Wide Delegation
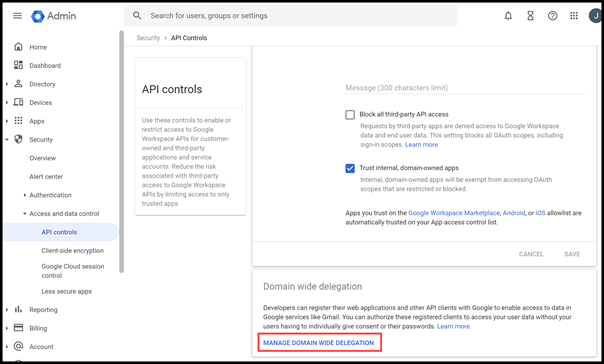
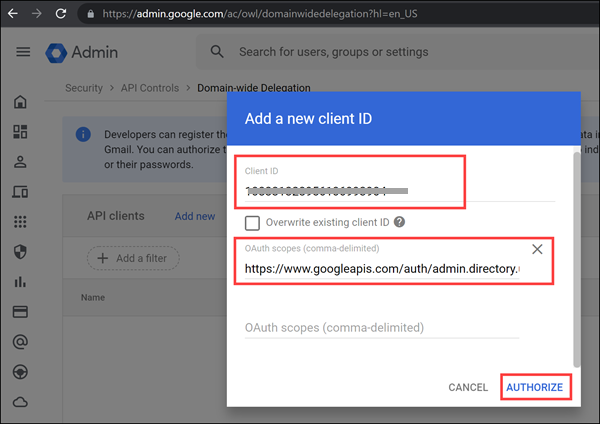
- Click Add new, paste the Unique ID as the Client ID. In the OAuth scopes field, enter the following list of scopes and then click Authorize.
https://www.googleapis.com/auth/admin.directory.user.readonly, https://www.googleapis.com/auth/calendar
Indoor Finders - Enable Google as authentication Provider
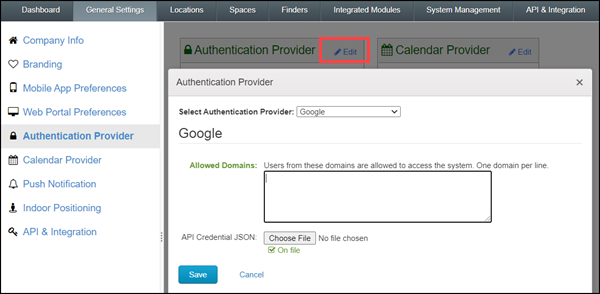
- Login to Indoor Finders Admin Console, Click Company Settings, and then click Edit in Authentication Provider section.
- Select Google as the Authentication Provider.
- In the Allowed Domains section, add your company email domain names.
- Select the JSON file that downloaded from the Google Admin console.
- Click Save button to save the changes and upload the JSON file.
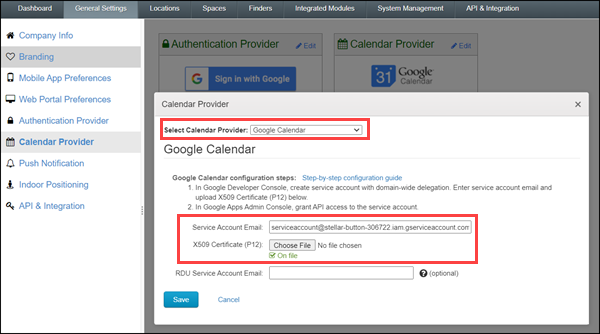
- Click Edit in Calendar Provider section, select Google Calendar as the Calendar Provider, then enter the Service Account Email and also upload the P12 certificate that you download previously. If you are deploying the Room Display Panel app, please enter a valid email address that use as the service account (The email address could be any valid email address, the system will use this account to retrieve and reserve conference room for the Room Display app).