Workspace Reservation Setup & Configuration
This document walk-through the initial steps to enable the Work-In-Office module.
Introduction
Reservable spaces are part of the seating spaces. Admin need to classify the workspace as Seating Spaces, then select the sub-class with either Assigned Seating Space, Hoteling or Hot-Desking spaces
- Assigned Seating Spaces - Assigned Seating Spaces are the spaces assigned to an individual. Admins may still need the users that had an assigned to make reservation for the purpose of capacity control.
- Hoteling - Hoteling spaces are the spaces that can be reserveable in advance.
- Hot-Desking - Hot-Desking spaces are the spaces that can be reserve on first-come, first-serve purpose. There is no advance reservation for the Hot-Desking spaces
Enabling Spaces for Reservation
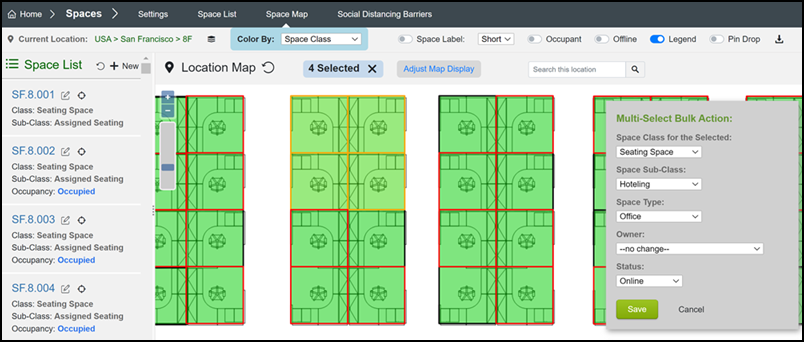
- To assign spaces, go to Admin Portal -> Spaces -> Space Map, select and the floor to view the floorplan and spaces.
- To assign or change space type, hold the ALT key then drag to select the multiple spaces, then update the space class and type on the right Legend panel. For reservation space, select the Space Class and Seating Spaces, Sub-Class as Assigned Seating, Hoteling, or Hot-Desking.
Module Settings
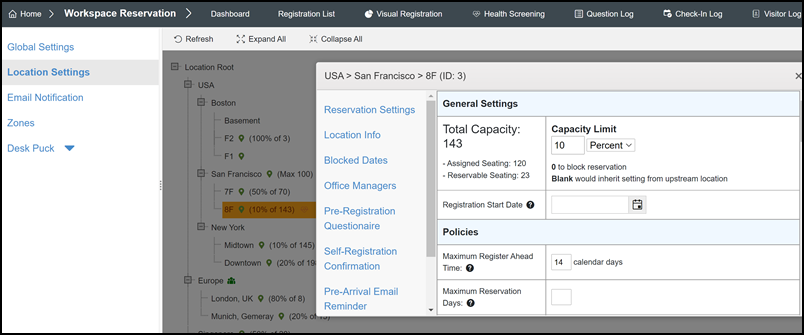
- By default, all locations are enabled for workspace reservation. The settings in located in Admin Portal -> Finders -> Workspace Reservation -> Settings.
- Admin can manage settings that based on locations or floor. Settings permission can inherit or if there is a specific settings in the floor level.
View WIO Setting Options for details
- Admin can also grant permission to local admin so they can manage the local settings. To add local Admin, enter the admin's email address in the Office Manager section.
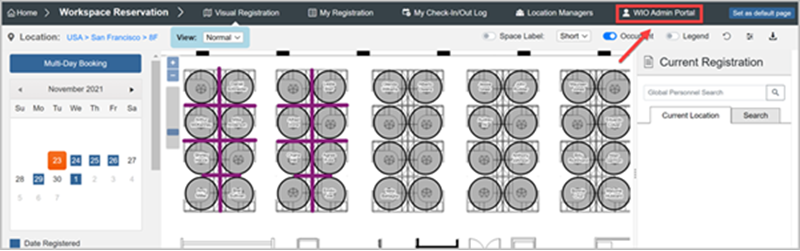
- Local admin can manage the delegated permission from the Indoor Finders User Portal -> Work-In-Office Reservation -> WIO Admin Portal.