Manage Seating Assignments
This document walk-though how to visually manage employee seating assignments
Granting Delegate Admin Permission
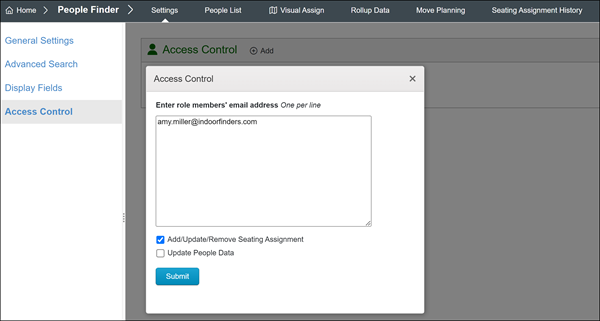
- Go to Admin Portal -> Finders -> People Finder -> Settings -> Access Control, click the Add button.
- Enter the delegate admin's email address, check the box Add/Update/Remvoe Seating Assignment and then click Submit.
Manage Seating Assignment by the Delegated Admin
- Login to the user portal, click on the People Finder icon.
- On the menu bar, click Seating Chart. If the user been delegated to manage seating assignment, the green Manage Seating Assignment button will be visiable. Click on the button to enter Visual Assignment tool.

- In Visual Assignment Tool, delegate admin can perform:
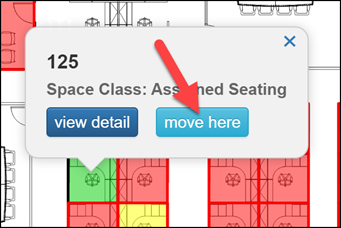
- Move - Click on a space to bring up the pop-up menu, click Move, then select the other space and click Move Here.
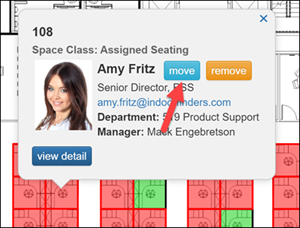
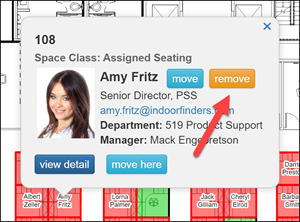
- Unassign - Click the space, in the pup-up menu, click Remove.
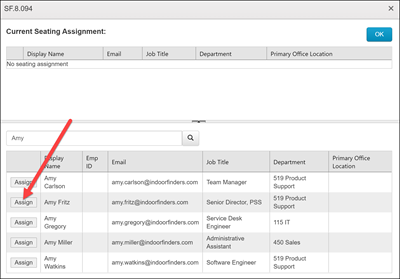
- Assign - On the side bar, search for the person name, then click on the name to select, then click the space and select Move here. Alternative, click on the space and select view detail, under Seating Assignment tab, click Add Assignment, then search the person's name and then click Assign.
System Admin / Seating Space Manager Module Admin
- Go to Admin Portal -> Finders -> Seating Space Manager -> Visual Assign.
- Follow the same instruction as a delegated admin.
- The Seating Assignment History log is available in the Admin Portal -> Finders -> People Finder -> Seating Assignment History
Workspace Reservation Office Admin
- Login to the user portal, click on the Workspace Reservation module icon.
- On the menu bar, if the user been delegated as office admin, the Office Admin Portal will be visiable. Click on it to enter Office Admin Portal.
- In the manual bar, click Visual Registration.
- Select a seating space, then follow the same instruction to assign, unassign, move, or update the seating space details.